
In today’s fast-paced world, getting a good night’s sleep can be a challenge. Sleep disorders, such as sleep apnea, can greatly impact our overall health and quality of life. Fortunately, advancements in technology have provided solutions for better sleep therapy. One such innovation is the ResMed AirSense 10, a device designed to optimize sleep therapy. In this article, we will explore the importance of sleep therapy, the key features of the ResMed AirSense 10, and provide tips for users to enhance their sleep therapy experience.
Understanding the Importance of Sleep Therapy
Sleep plays a vital role in our overall health and well-being. It is during sleep that our bodies repair themselves and our minds consolidate information. Lack of quality sleep can lead to a wide range of health issues, including fatigue, irritability, and even serious medical conditions like heart disease and diabetes. It is essential to address sleep disorders and optimize sleep therapy to ensure a restful night’s sleep.
When we sleep, our bodies go through different stages that are crucial for our physical and mental well-being. These stages, including deep sleep and rapid eye movement (REM) sleep, allow our bodies to repair tissues, boost our immune system, and improve cognitive function. By optimizing our sleep therapy, we can maximize the benefits of each sleep stage and wake up feeling refreshed and rejuvenated.
But what exactly happens during these sleep stages? During deep sleep, also known as slow-wave sleep, our bodies experience a period of intense physical restoration. This is when our muscles repair themselves, growth hormones are released, and our energy levels are replenished. Without enough deep sleep, we may wake up feeling groggy and sluggish, unable to perform at our best.
On the other hand, ResMed AirSense, REM sleep is the stage where our brains are most active. It is during ResMed AirSense REM sleep that we experience vivid dreams and our brains process and consolidate information from the day. This stage is essential for learning, memory formation, and emotional regulation. Without enough REM sleep, we may struggle with memory problems, difficulty concentrating, and mood disturbances.
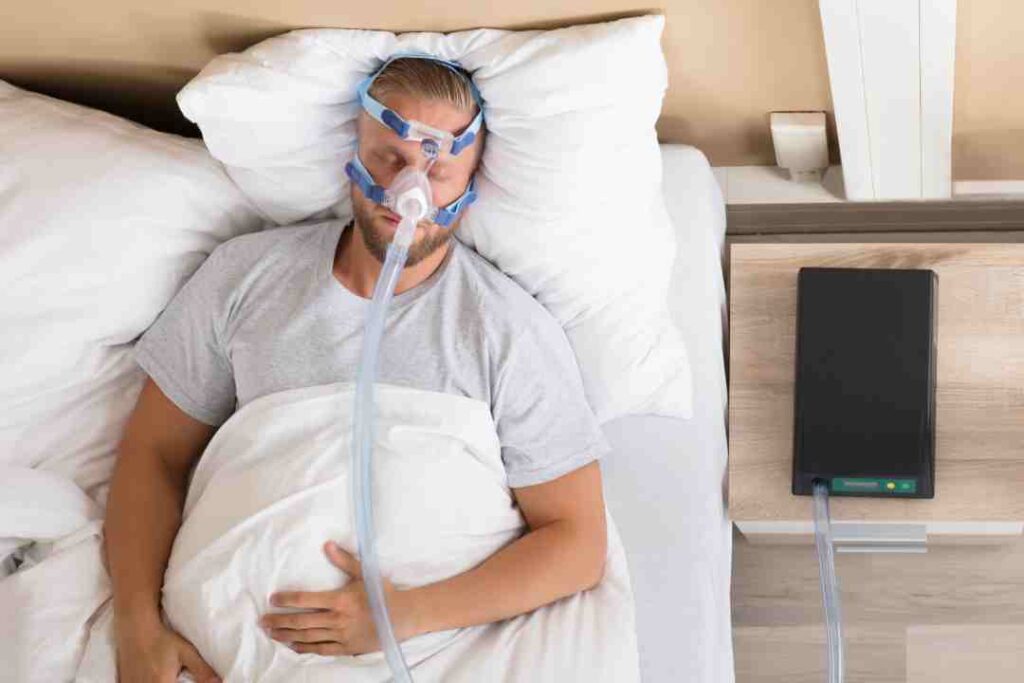
Unfortunately, many individuals suffer from sleep disorders that disrupt these important sleep stages. Sleep apnea, for example, is a common sleep disorder characterized by pauses in breathing during sleep. These pauses can last for seconds to minutes and can occur multiple times throughout the night. As a result, individuals with sleep apnea often experience interrupted sleep, leading to excessive daytime sleepiness, reduced concentration, and an increased risk of accidents.
However, there is hope for those struggling with sleep disorders. Sleep therapy devices, such as the ResMed AirSense 10, are designed to help individuals breathe more easily and maintain a continuous flow of air during sleep. These devices work by delivering positive air pressure, keeping the airway open and preventing pauses in breathing. By addressing sleep disorders with the help of sleep therapy devices, individuals can regain control of their sleep and improve their overall quality of life.
In addition to sleep therapy devices, there are other lifestyle changes and habits that can contribute to better sleep. Creating a relaxing bedtime routine, optimizing sleep environment, and practicing good sleep hygiene can all help promote quality sleep. Avoiding caffeine and electronic devices before bed, keeping a consistent sleep schedule, and creating a comfortable sleep environment are just a few examples of healthy sleep habits that can make a significant difference.
Ultimately, understanding the importance of sleep therapy and taking steps to optimize our sleep can have a profound impact on our overall health and well-being. By prioritizing sleep and addressing any sleep disorders, we can enjoy the benefits of restful nights and wake up ready to tackle the day ahead. Click here to read about ResMed AirSense 10: An In-Depth Review of Its Features and Functionality.
Introduction to ResMed AirSense 10
The ResMed AirSense 10 is a cutting-edge sleep therapy device designed to improve comfort, convenience, and effectiveness. With its advanced features and user-friendly interface, it is revolutionizing the way individuals manage their sleep apnea. Let’s explore some of the key features that make the ResMed AirSense 10 stand out.
Key Features of ResMed AirSense 10
The ResMed AirSense 10 is equipped with a range of features that enhance the sleep therapy experience. One standout feature is its AutoRamp technology, which gradually increases the pressure to deliver a more comfortable and seamless transition into sleep. This ensures that users can ease into their therapy without any abrupt changes in pressure, promoting a more restful and uninterrupted night’s sleep.
In addition to the AutoRamp technology, the ResMed AirSense 10 also features an integrated humidifier. This humidifier helps alleviate dryness and congestion often associated with sleep therapy, ensuring a more pleasant and comfortable experience. The humidifier can be adjusted to suit individual preferences, allowing users to customize their therapy to their specific needs.
Another notable feature of the ResMed AirSense 10 is its advanced data tracking capabilities. The device records detailed sleep data, including nightly usage and mask leak information. This data can be easily accessed through the user-friendly interface, providing users with valuable insights into their sleep therapy progress. By analyzing this data, users can identify patterns, track their progress, and make informed decisions to optimize their sleep therapy.
How ResMed AirSense 10 Enhances Sleep Therapy
The ResMed AirSense 10 goes beyond providing effective treatment for sleep apnea; it also offers insights and tools to optimize therapy. The detailed sleep data recorded by the device allows users to monitor their sleep patterns and identify any areas for improvement. This data can be shared with healthcare professionals, enabling them to provide personalized guidance and support.
Furthermore, the ResMed AirSense 10 features wireless connectivity, allowing users to connect the device to their smartphones or tablets. This enables them to access their sleep data remotely, making it even more convenient to track their progress and make adjustments as needed. The device can also send alerts and reminders to ensure users stay on track with their therapy, promoting consistency and optimal results.
With its innovative features and advanced technology, the ResMed AirSense 10 is a game-changer in the field of sleep therapy. It not only provides effective treatment for sleep apnea but also empowers users to take control of their therapy and improve their overall sleep quality. Whether you are new to sleep therapy or a long-time user, the ResMed AirSense 10 offers a comprehensive solution to enhance your sleep therapy experience.
Setting Up Your ResMed AirSense 10
Before starting your sleep therapy journey with the ResMed AirSense 10, it is essential to ensure a proper setup. Let’s walk through a step-by-step guide to help you get started.
Step-by-Step Guide to Setup
- Begin by unpacking the ResMed AirSense 10 and all its accessories, including the power cord, tubing, and filter. Ensure that everything is in good condition and clean.
- Connect the tubing to the device and secure it in place. Make sure it is free from any kinks or blockages.
- Fill the integrated humidifier chamber with distilled water according to the manufacturer’s instructions. Then, attach it to the device.
- Plug in the power cord and connect the device to a power source.
- Turn on the ResMed AirSense 10 and follow the on-screen prompts to set up your preferences, such as language, time, and therapy settings.
- Put on your mask and adjust it for a comfortable and secure fit.
- Lie down in your preferred sleeping position and start the therapy. The device will gradually ramp up the pressure to meet your therapy needs.
Troubleshooting Common Setup Issues
While the setup process is usually straightforward, some common issues may arise. If you experience any difficulties, consider the following troubleshooting tips:
- – Check that all connections are secure and tight.
- – Ensure that the mask is fitted correctly and seals properly.
- – Verify that the water chamber is filled with distilled water and securely attached.
- – Double-check that the device is powered on and the power cord is connected properly.
- – If issues persist, consult the user manual or contact customer support for further assistance.
Setting up your ResMed AirSense 10 is an important step towards improving your sleep therapy experience. By carefully following the step-by-step guide, you can ensure that the device is properly connected and ready for use.
Unpacking the ResMed AirSense 10 is an exciting moment as you prepare to embark on your sleep therapy journey. Take a moment to inspect each component, ensuring that they are in good condition and free from any damage. Cleanliness is also crucial, so make sure to wipe down the device and accessories before proceeding with the setup.
Connecting the tubing to the device is a simple process, but it is important to do it correctly. Ensure that the tubing is securely attached to the device and that there are no kinks or blockages that could disrupt the airflow. A smooth and unobstructed airflow is essential for effective sleep therapy.
The integrated humidifier chamber is a valuable addition to the ResMed AirSense 10, providing moisture to prevent dryness and discomfort during therapy. Follow the manufacturer’s instructions to fill the chamber with distilled water, as using tap water may lead to mineral buildup. Once filled, attach the chamber to the device, ensuring a secure connection.
Plugging in the power cord and connecting the device to a power source is the next step in the setup process. Make sure the power source is easily accessible and that the cord is not tangled or damaged. Once connected, you can proceed to turn on the ResMed AirSense 10.
When you power on the device, you will be guided through a series of on-screen prompts to set up your preferences. These preferences include selecting your language, setting the time, and configuring your therapy settings. Take your time to customize these settings according to your needs and preferences for a personalized sleep therapy experience.
Putting on the mask is a crucial step in the setup process, as it ensures a comfortable and secure fit. Adjust the straps and headgear to achieve a snug but not overly tight fit. The mask should create a proper seal without causing any discomfort or pressure points. Take a few moments to familiarize yourself with the mask and its adjustments before starting the therapy.
Finally, lie down in your preferred sleeping position and start the therapy. The ResMed AirSense 10 is designed to gradually ramp up the pressure to meet your therapy needs, ensuring a smooth and comfortable transition into sleep. Allow yourself to relax and let the device do its work in providing you with effective sleep therapy.
Despite the straightforward setup process, it is not uncommon to encounter some common issues. If you experience any difficulties, there are a few troubleshooting tips you can try. Firstly, check that all connections are secure and tight, as loose connections may disrupt the therapy. Secondly, ensure that the mask is properly fitted and seals properly, as leaks can affect the effectiveness of the therapy. Additionally, verify that the water chamber is filled with distilled water and securely attached to the device. Lastly, double-check that the device is powered on and that the power cord is connected properly to the power source.
If issues persist despite your troubleshooting efforts, do not hesitate to consult the user manual or contact customer support for further assistance. They will be able to provide you with expert guidance and help resolve any setup issues you may encounter.
Optimizing Your Sleep Therapy with ResMed AirSense 10
Now that you have set up your ResMed AirSense 10, it’s time to optimize your sleep therapy experience to achieve maximum comfort and effectiveness.
Adjusting Settings for Maximum Comfort
Every individual is unique, and it may take some time to find the optimal therapy settings for your needs. Take advantage of the ResMed AirSense 10’s customizable features, such as adjusting the ramp-up time and the humidity level. Experiment with different settings until you find what works best for you. Remember to consult your healthcare provider for guidance on adjusting your therapy settings.
Understanding and Using Sleep Data
The ResMed AirSense 10 provides valuable sleep data that can help you gauge the effectiveness of your therapy. Regularly review the sleep reports, including usage hours, mask fit, and AHI (Apnea-Hypopnea Index) readings. This data can provide insights into your sleep patterns and guide you in making necessary adjustments to optimize your therapy. Share your sleep data with your healthcare provider during follow-up appointments to receive personalized recommendations.
Maintenance and Cleaning of ResMed AirSense 10
To ensure the longevity and effectiveness of your ResMed AirSense 10, proper maintenance and cleaning are essential.
Routine Cleaning Tips
1. Disconnect the device from the power source and disassemble the mask, tubing, and water chamber.
2. Wash the mask, tubing, and water chamber with mild soap and warm water
3. Rinse thoroughly and let the components air dry away from direct sunlight.
4. Clean the device’s exterior with a soft cloth and mild detergent. Avoid using harsh chemicals or abrasive materials
5. Regularly replace the filter according to the manufacturer’s instructions.
6. Reassemble the device and perform a thorough inspection before using it again.
When to Replace Parts and Accessories
Regularly inspect your ResMed AirSense 10’s parts and accessories for signs of wear and tear. Replace the mask cushions, tubing, and water chamber as recommended by the manufacturer or your healthcare provider. Following the recommended replacement schedule will ensure optimal performance and hygiene.
By following these tips and utilizing the features of the ResMed AirSense 10, users can optimize their sleep therapy and enjoy the benefits of a restful night’s sleep. Remember, consistently using your ResMed AirSense 10 and maintaining good sleep hygiene habits are key to achieving the best possible sleep therapy results. Prioritize your sleep health and reap the rewards of a revitalized and refreshed life.